How to Self-Host NocoDB on Fly.io
You want to self-host apps for fun or privacy - but not the ‘running servers in your garage’ type of self-hosted. In 2022 we live in a Golden Era of low-cost VPCs and hosting providers, and there has never been a better time for people looking to offload the frustrating parts of self-hosting, while still operating on a shoe-string budget (or free!).
So you want to host your own NocoDB Airtable alternative ? Love it! Let’s get you rolling. This guide will set you up on Fly.io with a SQLite backend. NocoDB has so many uses cases, but one feature I want to call out is how handy it is that it comes with a built-in API for items right out of the gate. Can anyone say speedy MVPs?
😢 SQLite??? Is that even production ready??
You’d be surprised how much traffic you can support with SQLite - NomadList & RemoteOK both run on it and pull in significant revenue ($millions) and handle tons of traffic. Read more in Consider SQLite and how Michael Lynch uses SQLite + Litestream to never worry about backups .
Now let’s get your server running & get you back to whatever more important things you’re avoiding!
🛠️ Fly.io account setup
We need to take a quick detour to ensure you have an account with Fly.io .
Install the
flyctlCLI tool.Authenticate with
flyctl auth signup(for newbies), orflyctl auth login(existing accounts).⚠️ You will have to add credit card information to the account, so if that’s enough to keep you from using a free service 🤷- keep your usage to the free tier and you’ll have no issues.
🤸Deploying NocoDB to Fly.io 🔗︎
With account setup out of the way, we will have a running instance of NocoDB on the interwebs in just 4 quick CLI commands. For reference, the Docker instructions for NocoDB .
Create a new directory & initialize the project with fly.toml.
 mkdir fly-nocodb/
cd fly-nocodb
flyctl launch --image=nocodb/nocodb:latest --no-deploy
Create the volume for persistent storage.
ℹ️ I set this to volume of 1 GB since I am deploying multiple apps on Fly, but the free tier supports up to 3GB for your account .
flyctl volumes create nocodb_vol --size 1 -r ordManually edit
fly.toml: Update the mounts to use the new volume .[mounts] source="nocodb_vol" destination="/usr/app/data"(Optional) Manually edit
fly.toml: update any relevant NoCODB production variables .I chose to disable telemetry and remove the initial loading screen, but you can also set variables to connect to AWS S3, change security settings, connect other database, and more.
[env]
    NC_DISABLE_TELE = "true"
    NC_MIN = "true"
🪄 Deploy your new app -
flyctl deploy.... .... ==> Creating release --> release v2 created --> You can detach the terminal anytime without stopping the deployment ==> Monitoring deployment 1 desired, 1 placed, 1 healthy, 0 unhealthy [health checks: 1 total, 1 passing] --> v0 deployed successfully
You now have a live app running on Fly.io
! Not needed, but if you already forgot the URL (like me), anytime you can run flyctl info in the directory with your fly.toml to check on your shiny new app.
⚠ Make sure to save the
fly.tomlconfiguration file! That’s how theflyctlcommand knows which of your running apps to be able to run commands against.
```
19:16:50:~/work/fly-nocodb: [0]▶ flyctl info
App
  Name     = bold-bird-3731
  Owner    = personal
  Version  = 0
  Status   = running
  Hostname = bold-bird-3731.fly.dev

Services
PROTOCOL PORTS
TCP      80 => 8080 [HTTP]
         443 => 8080 [TLS, HTTP]

IP Adresses
TYPE ADDRESS             REGION CREATED AT
v4   37.16.5.93                 1m23s ago
v6   2a09:8280:1::3:3873        1m23s ago
```
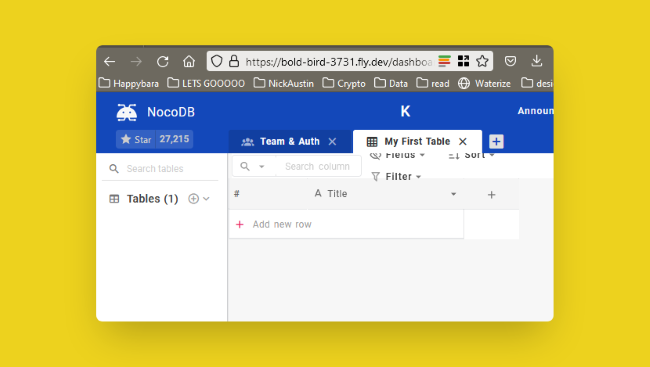
🌴NocoDB live on Fly.io 🔗︎
With a few commands and almost no thought required, I have a self-hosted Airtable alternative NocoDB live and ready for use. The sky is the limit from here.
Upgrade NocoDB Instance 🔗︎
Your instance has been humming along successfully for a while, but now you want to pull in all the latest & greatest features that were added to NocoDB. How does one update their self-hosted app?
- Navigate to the directory where your
fly.tomlis saved. - Run
flyctl deployjust like when we first created the app.- Since we chose
latestfor our Docker image, each time we run deploy it will grab the most recently published version.
- Since we chose
Once the deployment is successful, you’ll be prompted to login again.
Other quick options 🔗︎
Fly is not the only simple hosting provider out there - there’s a gluttony of choice, and you as the customer are winning! A few other options include:
See Also
- How to Self-Host n8n on Fly.io
A simple guide to self-host n8n in just a few minutes on fly.io.
- How to Self-Host Actual Budget on Fly.io
A simple guide to self-host an Actual server in just a few minutes, for free.
- Automate Recurring Venmo Payments with Github Actions and IFTTT
Let the nice robots at GitHub handle sending Venmo requests to your friends.
- Creating Pages from Data Programmatically for Hugo
Ways to programmatically generate pages from data for Hugo. Automate your page creation.
- Obsidian Plugins for the Casual User
Plugins to make Obsidian as comfortable as other note apps, aimed at those who want tools that don’t need tinkering.